
Your Google account is an essential part of your Android device, and it’s associated with a phone number for security and account recovery purposes. However, there are situations where you might need to change the phone number linked to your Google account. In this article, we’ll guide you through the steps to change your Google number on an Android device.
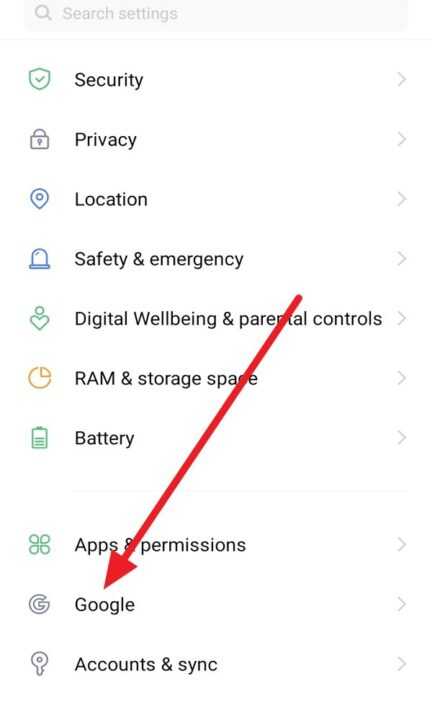
1. Unlock your Android device and open the Settings app.
2. Scroll down and tap on the Google section.
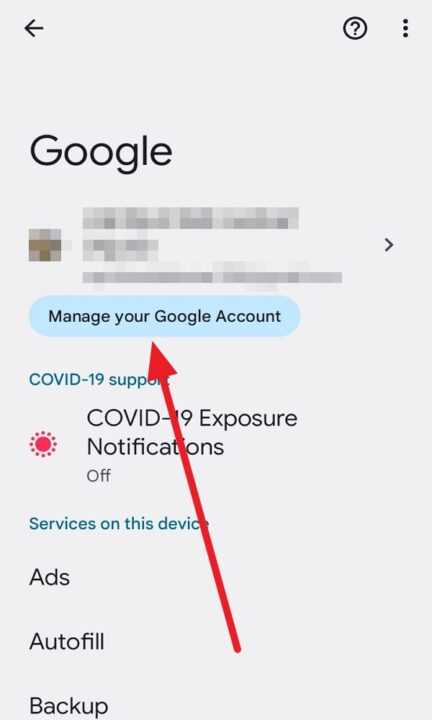
3. Next, tap Manage your Google Account.
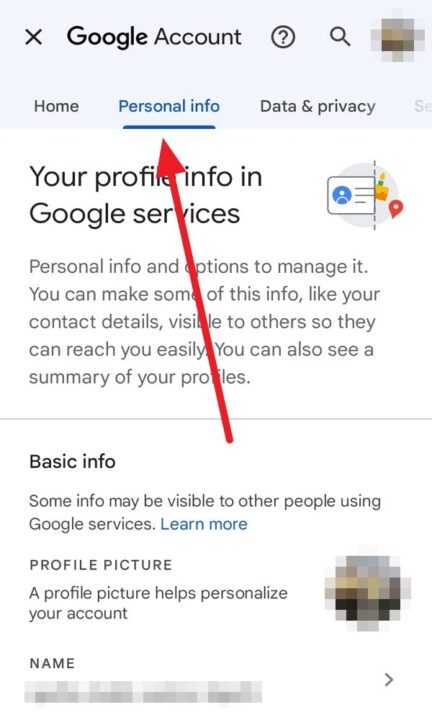
4. In the Google account settings, tap on the Personal info option.
5. Scroll down and tap on PHONE.
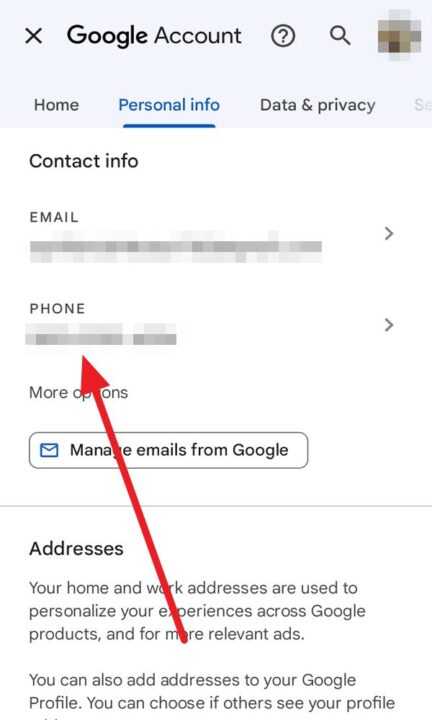
6. You will see your current recovery phone number listed. To change it, tap on the existing phone number.
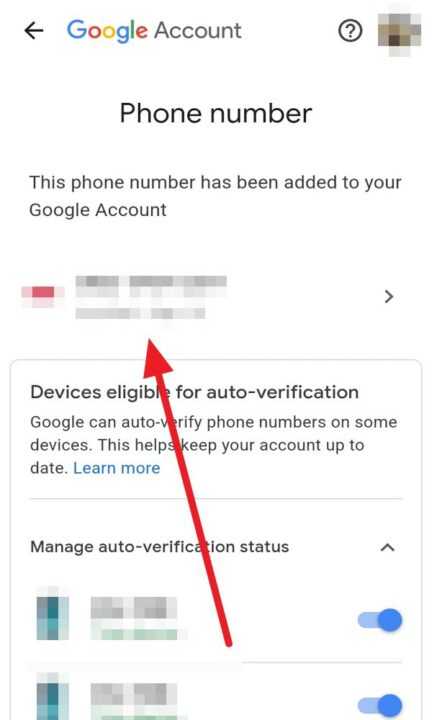
7. Tap the pencil icon at the top right of your phone number.

8. You will be prompted to enter your passkey to confirm your identity and then tap Continue to proceed.
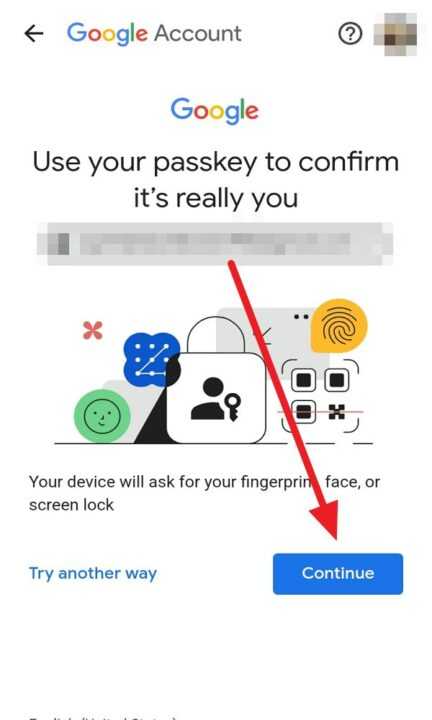
9. After entering your passkey, tap the pencil icon again at the top right of your number.
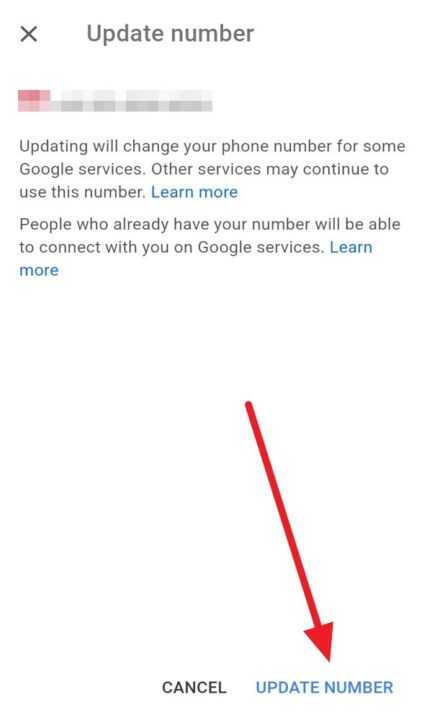
10. Next, tap UPDATE NUMBER at the bottom right of the screen.
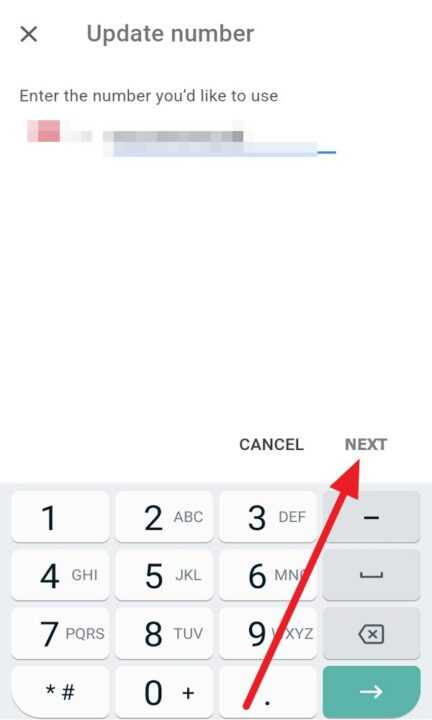
11. And then, enter your new phone number and tap NEXT.
12. Google will send a verification code to the new phone number you’ve entered.
13. Check your phone’s messages or voicemail for the verification code and enter it in the provided space.
14. Tap Verify to confirm the new phone number.
15. Once the verification is successful, Google will notify you that your recovery phone number has been changed.
Changing your Google number on your Android device is a straightforward process that can help you keep your account information up to date. It’s crucial to ensure that the new phone number you associate with your Google account is valid and easily accessible, as it plays a crucial role in account recovery and security. By following these steps, you can easily make the necessary changes to your Google number.
Leave a Reply