In our fast-paced digital world, a fully charged smartphone is essential. However, many Android users face the common problem of slow charging. This issue can stem from various factors, including hardware problems, software glitches, or simply improper charging habits.
Before we dive into the solutions, it’s important to understand that charging speeds can vary depending on your device model, battery capacity, and the charger you’re using. What might be considered “slow” for one device could be normal for another. Nevertheless, if you’ve noticed a significant decrease in charging speed compared to when your device was new, it’s time to investigate and resolve the issue.
Let’s explore the steps you can take to diagnose and fix slow charging problems on your Android device.
Step 1: Check Your Charging Cable and Adapter
The first and most obvious step is to examine your charging equipment. Often, the culprit behind slow charging is a faulty cable or adapter.
Inspect the cable:
- Look for any visible damage, such as fraying or kinks
- Ensure the connectors are clean and free from debris
- Try wiggling the cable while it’s plugged in – if the charging starts and stops, it’s likely damaged
Check the adapter:
- Make sure it’s the original charger or a reputable third-party option
- Verify that it provides the correct voltage and amperage for your device
- Look for any signs of damage or overheating
If you suspect either the cable or adapter might be the problem, try using a different set to see if it improves charging speed. It’s always a good idea to keep a spare charging set on hand for troubleshooting purposes.
Step 2: Clean the Charging Port
Over time, lint, dust, and debris can accumulate in your device’s charging port, preventing a proper connection and slowing down the charging process.
To clean the charging port:
- Power off your device
- Use a small, soft brush (like a clean toothbrush) or compressed air to gently remove any visible debris
- For stubborn dirt, carefully use a toothpick or plastic dental pick – avoid metal tools that could damage the port
- Once clean, try charging your device again
Be extremely careful when cleaning the charging port to avoid damaging the delicate connectors inside.
Step 3: Update Your Android Operating System
Outdated software can sometimes cause charging issues. Keeping your Android OS up-to-date ensures you have the latest optimizations and bug fixes that could potentially resolve slow charging problems.
To update your Android OS:

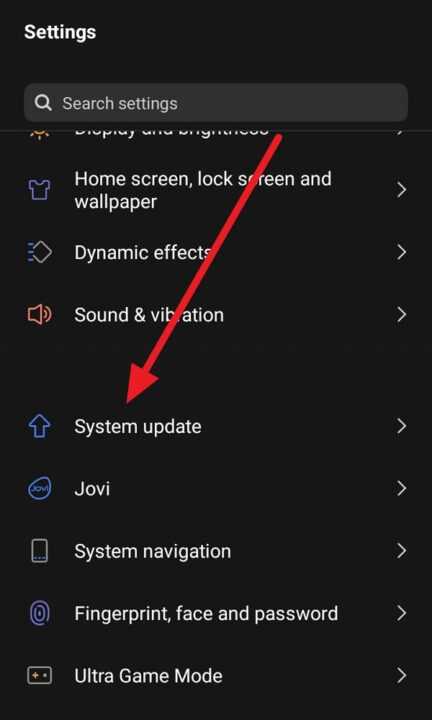
- Go to Settings > System > System Update
- If an update is available, download and install it
- Restart your device and check if charging speed improves
Remember that the exact steps may vary slightly depending on your device manufacturer and Android version.
Step 4: Close Background Apps and Reduce Screen Brightness
Running multiple apps in the background and having a bright screen can drain your battery faster than it can charge, giving the impression of slow charging.
To optimize your device while charging:
- Close all unnecessary apps running in the background
- Lower screen brightness or enable auto-brightness
- Turn on airplane mode if you don’t need network connectivity
- Avoid using your device while it’s charging, if possible
These steps can help your device charge faster by reducing power consumption during the charging process.
Step 5: Check for Battery-Draining Apps
Some apps can be particularly power-hungry, causing your device to charge slowly or even lose battery while plugged in. To identify these apps:

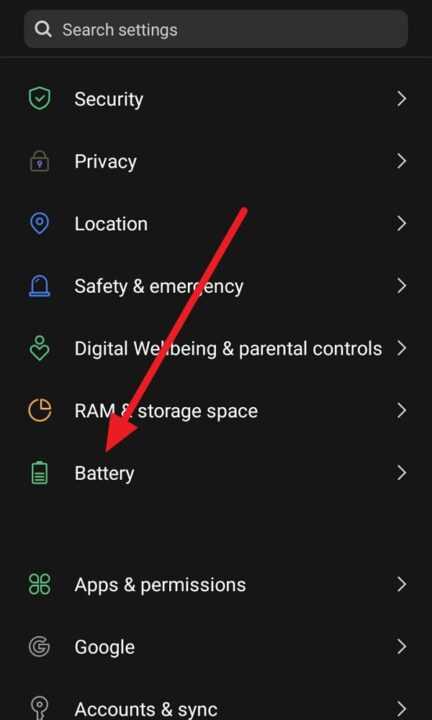
- Go to Settings > Battery
- Look for the battery usage breakdown by app
- Uninstall or restrict background usage for apps consuming excessive power
Consider using built-in battery optimization features or third-party battery saving apps to manage power-hungry applications more effectively.
Step 6: Enable Fast Charging (If Available)
Many modern Android devices support fast charging, but this feature might not be enabled by default.
To enable fast charging:
- Go to Settings > Battery
- Look for an option like Fast charging or Advanced charging
- Toggle it on if it’s available
Note that fast charging requires a compatible charger and cable, so make sure you’re using the appropriate equipment.
Step 7: Calibrate Your Battery
Sometimes, the Android system may not accurately report the battery level, leading to charging issues. Calibrating your battery can help resolve this:
- Use your device until it shuts down due to low battery
- Charge it to 100% without interruption
- Unplug and use the device until it shuts down again
- Repeat this process 2-3 times
This process helps recalibrate the battery management system, potentially improving charging performance.
Step 8: Check for Water Damage
If your device has been exposed to water or high humidity, it could affect the charging port and overall charging performance.
Signs of water damage include:
- Visible moisture in the charging port
- Corrosion on the charging port connectors
- A persistent moisture detected notification
If you suspect water damage:
- Power off your device immediately
- Remove the battery if possible (for devices with removable batteries)
- Place the device in a bag of uncooked rice or silica gel packets for 24-48 hours
- After drying, try charging again
For severe cases or if you’re unsure, it’s best to consult a professional repair service.
Step 9: Perform a Factory Reset
If none of the above steps have resolved the slow charging issue, a factory reset might be necessary. This should be a last resort as it will erase all data on your device.
Before performing a factory reset:
- Back up all important data
- Make note of your Google account credentials
To perform a factory reset:
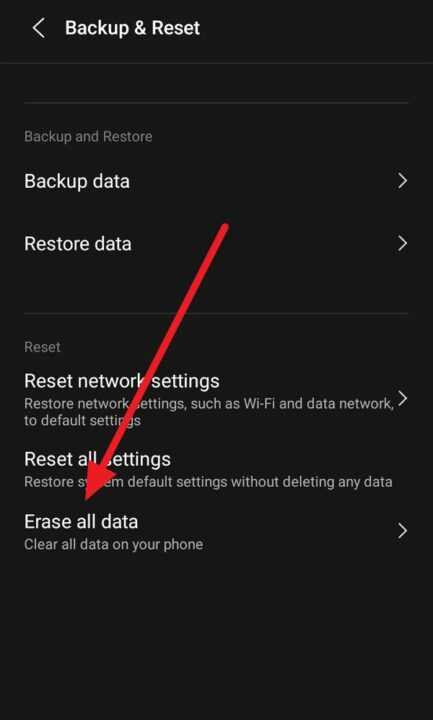
- Go to Settings > System > Reset options
- Select Erase all data (factory reset)
- Follow the on-screen instructions to complete the process

After the reset, set up your device as new and check if the charging speed has improved.
Step 10: Seek Professional Help
If you’ve tried all the above steps and your Android device is still charging slowly, it may be time to seek professional assistance. The issue could be related to hardware problems that require expert diagnosis and repair.
Consider the following options:
- Contact your device manufacturer’s customer support
- Visit an authorized service center
- Consult a reputable third-party repair shop
Be prepared to provide details about the steps you’ve already taken to troubleshoot the problem.
Conclusion
Slow charging on Android devices can be caused by a variety of factors, from simple software glitches to more complex hardware issues. By following these steps, you can diagnose and often resolve charging problems on your own. Remember to start with the simplest solutions, like checking your cable and adapter, before moving on to more drastic measures like factory resets.
Maintaining good charging habits can also prevent future issues:
- Use original or certified chargers and cables
- Avoid exposing your device to extreme temperatures
- Don’t let your battery drain completely too often
- Unplug your device once it’s fully charged
By taking care of your Android device and following these troubleshooting steps, you can ensure faster, more efficient charging and a longer-lasting battery. If problems persist, don’t hesitate to seek professional help to keep your device in top condition.
Remember, a well-maintained smartphone is key to staying connected and productive in our increasingly digital world. Take the time to address charging issues promptly, and you’ll enjoy a more reliable and efficient Android experience.

Leave a Reply