Have you ever accidentally deleted your call history on your Android phone and wished you could get it back? Or maybe you want to transfer your call logs to a new device? Luckily, if you have been backing up your Android phone’s data to Google Drive, you can easily restore your call history backup to your PC. In this article, we’ll walk you through the step-by-step process of retrieving your call logs from Google Drive and saving them to your computer.
Why Backup Call History to Google Drive?
Before we dive into the restoration process, let’s discuss why backing up your call history to Google Drive is important:
- Data loss prevention: Regularly backing up your call logs ensures you don’t lose this data if your phone is lost, stolen, or damaged.
- Easy transfer: When switching to a new Android device, you can quickly restore your call history from Google Drive, making the transition seamless.
- Accessibility: With your call logs backed up to the cloud, you can access them from any device, including your PC.
Steps to Restore Call History Backup from Google Drive to PC
Follow these simple steps to restore your call history backup from Google Drive to your computer:
Step 1: Ensure Call History is Backed Up
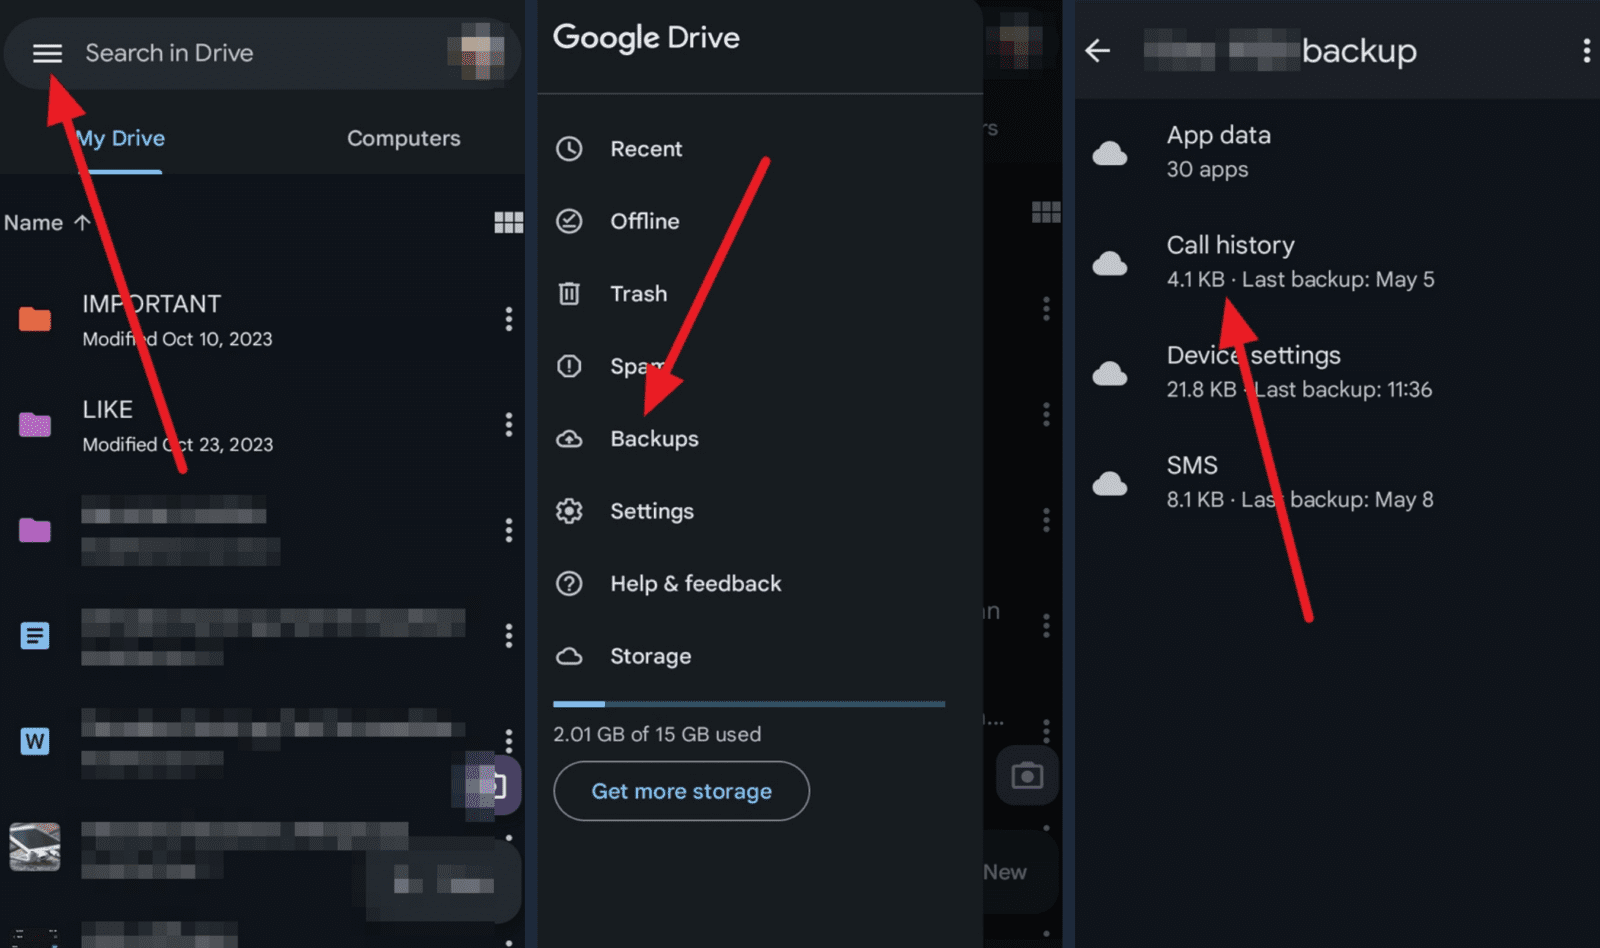
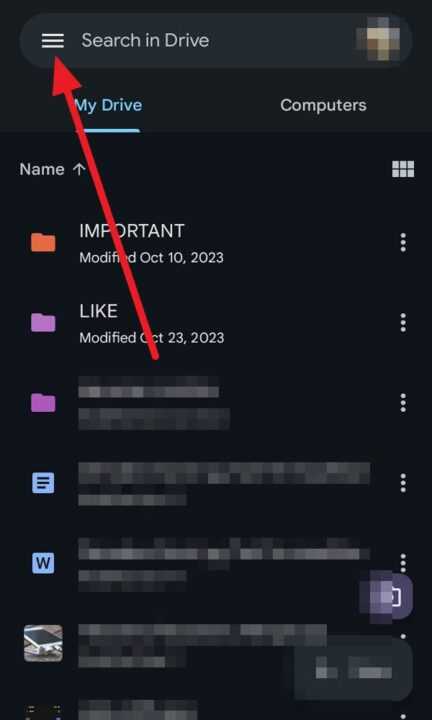
1. Open the Google Drive app on your Android phone.
2. Tap the three horizontal lines in the top-left corner to open the menu.
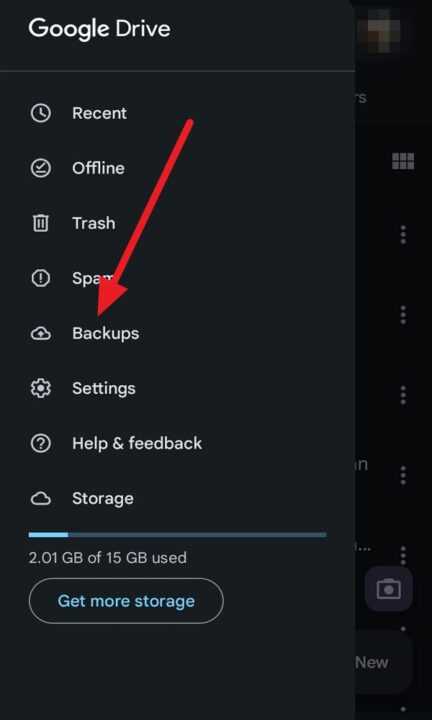
3. Select Backups to view your backed-up data.
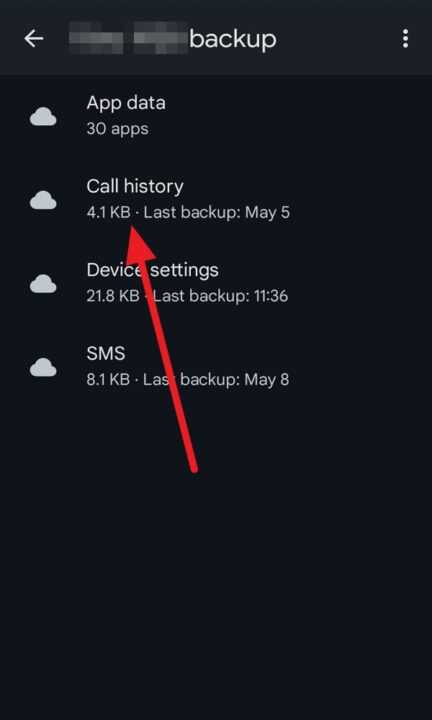
4. Look for your device’s name and check if Call History is listed under the backup details. If it is, proceed to the next step. If not, enable call history backup in your Android settings and wait for the next backup to occur.
Step 2: Download Call History Backup
- Go to the Google Drive website on your PC and sign in with the same account linked to your Android device.
- Click on the gear icon in the top-right corner and select Settings.
- Scroll down to the Download your data section and click on Create an archive.
- In the Select data to include section, deselect all options except for Drive.
- Click on the Down arrow next to Drive and select Backups.
- Click on Next step and choose your preferred file type, frequency, and delivery method.
- Click on Create archive. Google will start creating your backup archive, which may take some time depending on the size of your data.
Step 3: Extract Call History Data
- Once the archive is created, you will receive an email with a download link. Click on the link to download the archive to your PC.
- Extract the downloaded archive using a file extraction tool like WinRAR or 7-Zip.
- Open the extracted folder and navigate to the Takeout folder.
- Inside the Takeout folder, locate the Drive folder and open it.
- Find the folder with your device’s name and open it. This folder contains your call history backup.
Step 4: View and Save Call History
- Inside your device’s folder, look for a file named Call History.json or similar.
- Open this file using a text editor like Notepad or a JSON viewer for better readability.
- You can now view your call history, including details like phone numbers, call types (incoming, outgoing, or missed), and timestamps.
- To save the call history data, click on File and then Save As. Choose a location on your PC where you want to store the file and click Save.
Conclusion
Restoring your call history backup from Google Drive to your PC is a straightforward process that can be completed in just a few steps. By regularly backing up your Android device’s data to Google Drive, you can ensure that important information like call logs is never lost and can be easily accessed when needed. With your call history safely stored on your computer, you can analyze the data, save it for future reference, or even print it out for record-keeping purposes.
Leave a Reply