Facebook Live has become an increasingly popular way for group admins and members to connect with their communities in real-time. Whether you want to host a Q&A session, share breaking news, or simply engage with your audience, going live from your Android device is a convenient and powerful option. This guide will walk you through the process of broadcasting live video to your Facebook group using an Android smartphone or tablet.
Introduction
Facebook Groups provide a platform for like-minded individuals to come together and share common interests. By incorporating live video into your group’s content strategy, you can foster a more dynamic and interactive environment for your members. Going live allows for real-time engagement, immediate feedback, and a more personal connection with your audience.
While many users are familiar with going live on their personal profiles or pages, the process for broadcasting within a group may seem less straightforward. However, with the right knowledge and a few simple steps, you can easily harness the power of live video to enhance your group’s experience.
Steps to Go Live in a Facebook Group from Android
1. Ensure You Have the Latest Facebook App
Before attempting to go live, it’s crucial to make sure you have the most up-to-date version of the Facebook app installed on your Android device. This ensures you have access to all the latest features and improvements.
To update the Facebook app:
- Open the Google Play Store on your Android device
- Search for “Facebook”
- If an update is available, you’ll see an “Update” button next to the Facebook app
- Tap “Update” and wait for the process to complete
2. Access Your Facebook Group
Once you’ve confirmed that your Facebook app is up to date, it’s time to navigate to the group where you want to broadcast your live video.
To access your group:
- Open the Facebook app
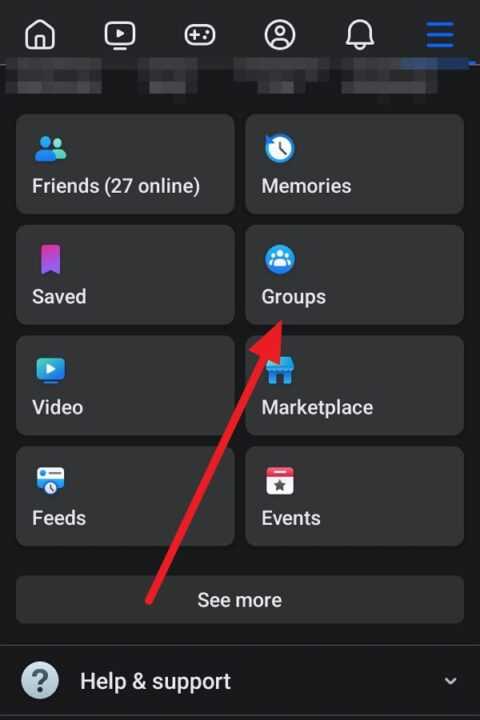
- Tap the menu icon (three horizontal lines) in the top right corner
- Scroll down and tap on “Groups”
- Select the specific group you want to go live in from your list of groups

3. Initiate the Live Video Process
Now that you’re in your desired group, you can begin the process of starting your live broadcast.
To start a live video:
- Look for the “What’s on your mind?” box at the top of the group’s feed
- Tap on this box to open the post creation screen
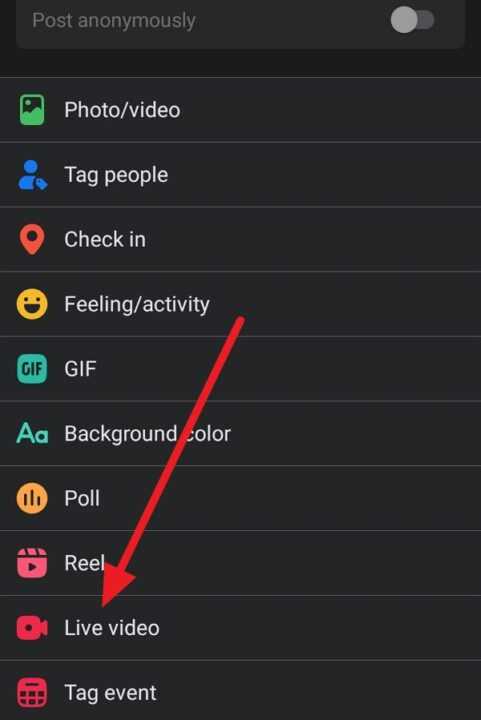
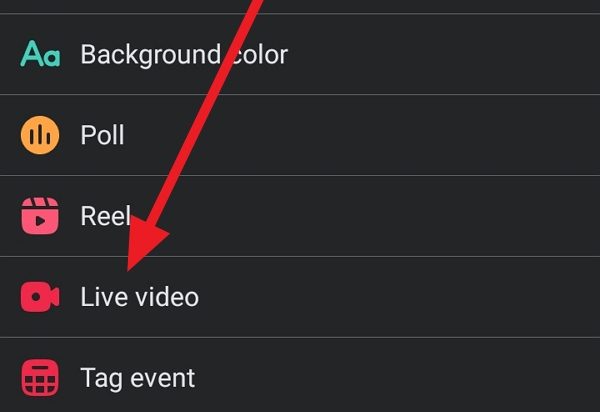
- Scroll down the list of post options until you see “Live Video”
- Tap on “Live Video” to proceed

4. Set Up Your Live Video
Before you actually go live, you’ll have the opportunity to configure some settings for your broadcast.
Key settings to consider:
- Privacy: Ensure that the privacy setting is set to your group. This should be automatic since you initiated the process from within the group.
- Title: Add a descriptive title for your live video. This helps group members understand what your broadcast is about.
- Description: Write a brief description to provide more context about your live video.
- Tags: Add relevant tags to make your video more discoverable within the group.
5. Prepare Your Camera and Audio
Before hitting the “Go Live” button, take a moment to ensure your camera and audio settings are optimized for the best possible broadcast quality.
Tips for optimal setup:
- Lighting: Position yourself in a well-lit area, preferably facing a light source.
- Background: Choose a background that’s not too distracting but still relevant to your content.
- Audio: Test your microphone by speaking a few words and listening to the playback. If possible, use a external microphone for better sound quality.
- Stability: Use a tripod or stable surface to keep your device steady during the broadcast.
6. Go Live
Once you’re satisfied with your setup and settings, it’s time to start your live broadcast.
To begin your live video:
- Tap the blue “Start Live Video” button at the bottom of the screen
- You’ll see a 3-second countdown before your broadcast begins
- Once live, you’ll see a red “Live” indicator at the top of your screen
7. Engage with Your Audience
During your live broadcast, it’s important to interact with your viewers to keep them engaged and encourage participation.
Ways to engage your audience:
- Welcome viewers: Greet people by name as they join your broadcast
- Answer questions: Keep an eye on the comments section and address questions as they come in
- Encourage interaction: Ask viewers to leave comments, reactions, or participate in polls if you’ve set them up
- Stay on topic: While it’s good to be responsive, try to maintain focus on your main topic or purpose for going live
8. End Your Live Video
When you’re ready to conclude your broadcast, it’s important to end it properly to ensure the video is saved and can be viewed later.
To end your live video:
- Tap the “Finish” button in the top right corner of your screen
- You’ll be given options to post the video to your group, delete it, or edit it before posting
- Choose “Post” to make the recorded video available in your group’s feed
Conclusion
Going live in a Facebook group from your Android device is a powerful way to connect with your community in real-time. By following these steps and best practices, you can create engaging live content that resonates with your group members and encourages active participation.
Remember, the key to successful live videos is preparation and engagement. Take the time to plan your content, ensure your technical setup is sound, and most importantly, be yourself and have fun with it. As you become more comfortable with the process, you’ll find that live videos can significantly enhance the sense of community within your Facebook group.
Whether you’re hosting regular Q&A sessions, sharing important updates, or simply chatting with your members, live video offers a unique and immediate way to foster connections. So don’t be afraid to experiment with different types of content and find what works best for your group. With practice, you’ll become a pro at leveraging Facebook Live to create memorable experiences for your community.

Leave a Reply