Ever tried to ask your Perplexity Assistant about your schedule, only to get shut down? ?? Yeah, I�ve been there too. The assistant is super handy for reminders and quick answers, but if you want it to check your calendar or add events, you need to give it permission first. If you�re scratching your head wondering how to do that, you�re in the right spot.
I�ll walk you through exactly how to turn on calendar access for Perplexity Assistant on Android. No more missed meetings or double-booked lunches. Once you set this up, you can ask the assistant about your day, add new events, or get reminders, all hands-free. Ready to make your life a bit easier? Here�s how.
Why Calendar Access Makes Perplexity Assistant Way More Useful
Giving Perplexity Assistant access to your calendar isn�t just a techy thing to do-it actually changes how you use your phone. Once it�s on, you can ask about your schedule, set up meetings, or get reminders for stuff you might forget. It�s like having a personal organizer that listens to you.
Without this permission, the assistant can�t peek at your calendar or add anything for you. That means you�re stuck typing or tapping around, which kind of defeats the point of having a voice assistant. If you�re serious about using Perplexity to manage your day, this is a must.
How Calendar Permissions Work
Android is all about privacy and control, so apps need your okay before they touch sensitive stuff like your calendar. When you give Perplexity Assistant the green light, it can read your events, add new ones, and remind you about them. You can always change these permissions later if you change your mind.
The process is simple and only takes a minute. Once it�s set, you won�t need to mess with it again unless you reinstall the app or reset your permissions. It�s quick, painless, and totally worth it.
Step-by-Step to Enable Calendar Access
-
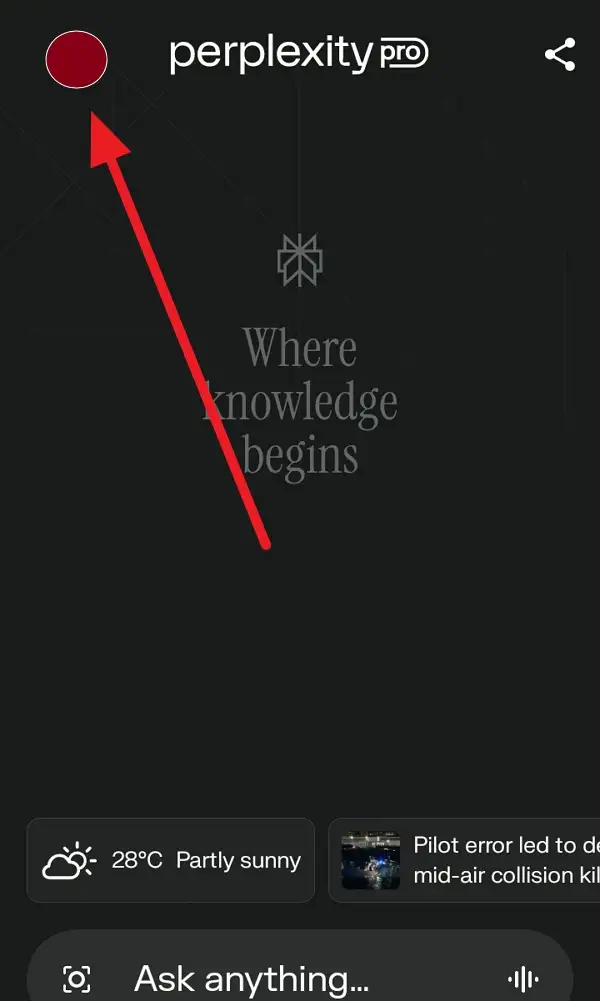
Open the Perplexity app on your Android device.
-
Tap your profile picture in the top-left corner.
-
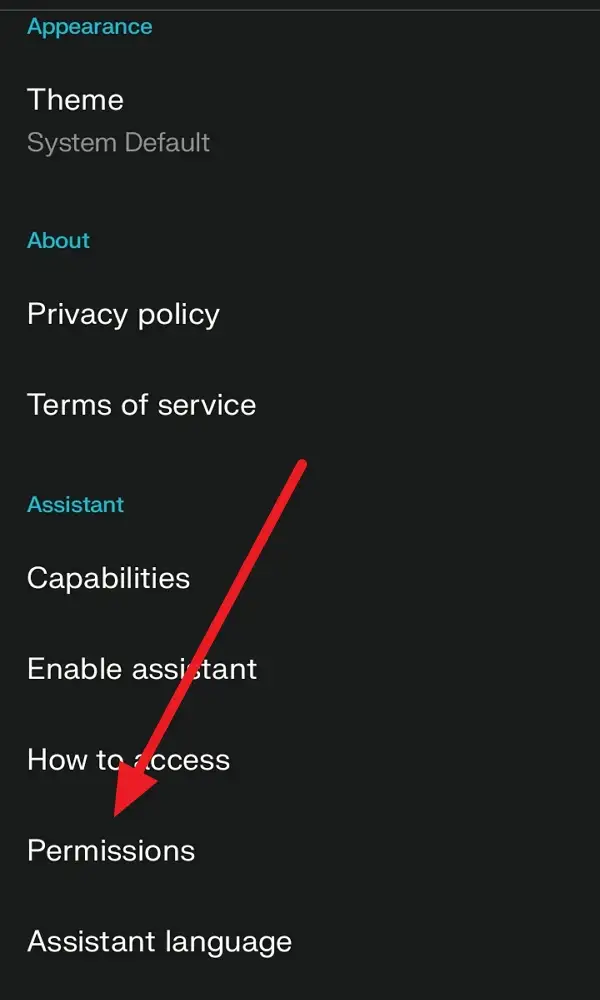
Scroll down until you see the Assistant option.
-
Select Permissions from the list.
-
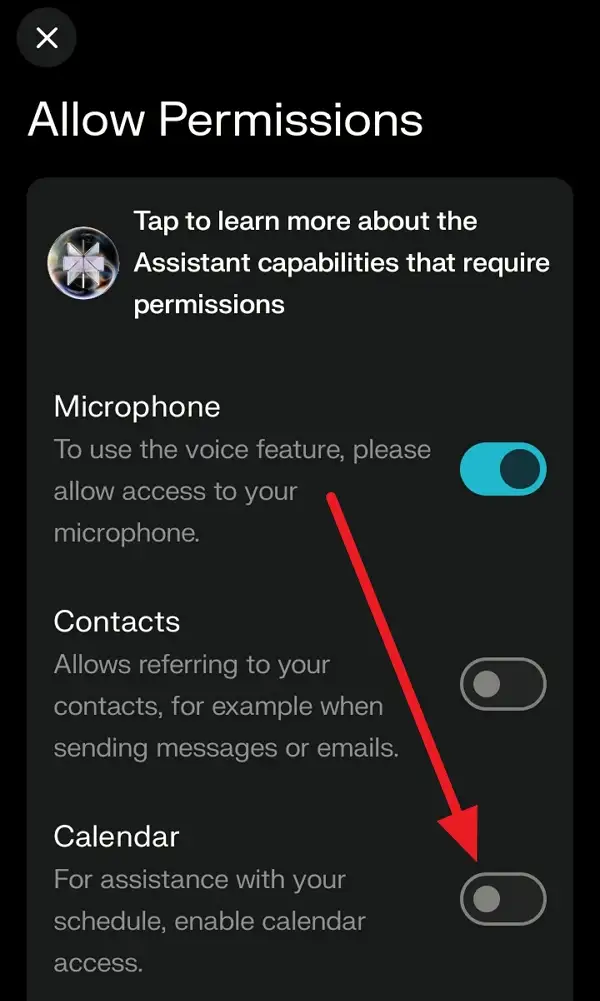
Find the Calendar option in the permissions menu.
-
Tap on Calendar to toggle access on.
-
If prompted, confirm that you want to allow calendar access.
-
Close the settings and return to the main screen.
-
Test it out by asking Perplexity Assistant about your schedule! ??
What to Expect After Granting Calendar Access
Once you�ve turned on calendar permissions, Perplexity Assistant can check your events, add new ones, and remind you about important stuff. You can just say, �What�s on my calendar today?� or �Add lunch with Jamie at noon,� and it�ll handle the rest.
If you ever feel like your privacy is at risk or you just want to take back control, you can turn off calendar access any time in the same settings menu. The assistant will stop checking your calendar, but you�ll still have all the other features.
Conclusion
Giving Perplexity Assistant access to your calendar on Android is a quick win. It takes less than a minute and makes your assistant way more helpful. No more flipping between apps or forgetting what�s next on your agenda.
If you want a smarter, more helpful assistant, this is the move. Try it out and see how much smoother your day gets. Got questions? Check out the FAQs below.
FAQs
How do I know if calendar access is enabled?
You�ll see the Calendar toggle switched on in the Permissions menu, and the assistant will respond to calendar-related requests.
Can I turn off calendar access later?
Yep, just go back to the Permissions menu and toggle Calendar off any time.
Will Perplexity Assistant add events to all my calendars?
It depends on which calendars are synced with your device. Usually, it works with your main Google Calendar.
What happens if I deny calendar access?
The assistant won�t be able to read or add events, so calendar features won�t work.
Is my calendar data shared with anyone else?
Perplexity Assistant only uses your calendar data to help with your requests. You can always check the app�s privacy policy for more details.