Creating a collage is a fantastic way to showcase multiple photos in a single image, allowing you to tell a story or capture the essence of an event in one visually appealing composition. Google Photos, the popular photo storage and editing app, offers a user-friendly collage-making feature that’s perfect for Android users. In this comprehensive guide, we’ll walk you through the step-by-step process of creating a stunning collage using Google Photos on your Android device.
Introduction
Google Photos has evolved from a simple gallery app to a powerful tool for organizing, editing, and sharing your photos and videos. One of its standout features is the ability to create collages quickly and easily. Whether you want to commemorate a special occasion, showcase your travel adventures, or simply combine your favorite snapshots, Google Photos provides an intuitive collage-making experience that doesn’t require any advanced photo editing skills.
Before we dive into the steps, it’s worth noting that to use Google Photos effectively for creating collages, your Android device should have at least 3GB of RAM and be running Android 8.0 or higher. This ensures smooth performance and access to all the latest features. Now, let’s get started with the process of making a collage in Google Photos on your Android device.
Step 1: Open Google Photos and Select Your Images
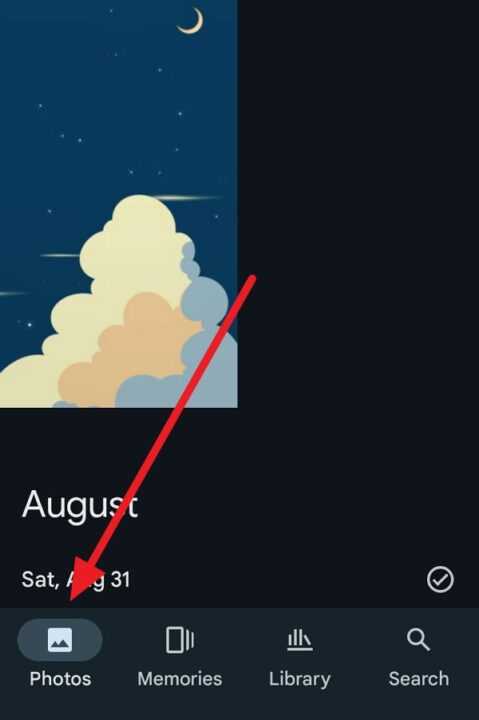
The first step in creating your collage is to open the Google Photos app on your Android phone or tablet. Once you’re in the app, follow these instructions:

- Navigate to the “Photos” section of the app, where all your images are displayed.
- Browse through your photos and select the ones you want to include in your collage.
- You can select up to 6 photos for your collage.
- To select multiple photos, simply tap and hold on the first photo you want to include, then tap on the additional photos you wish to add to your selection.
Pro tip: Choose photos that complement each other in terms of color, theme, or subject matter to create a visually cohesive collage.
Step 2: Access the Collage Creation Tool
After selecting your photos, it’s time to access the collage creation tool. Here’s how:
- With your photos selected, look for the “Add to” button at the bottom of the screen. It’s represented by a plus (+) icon.
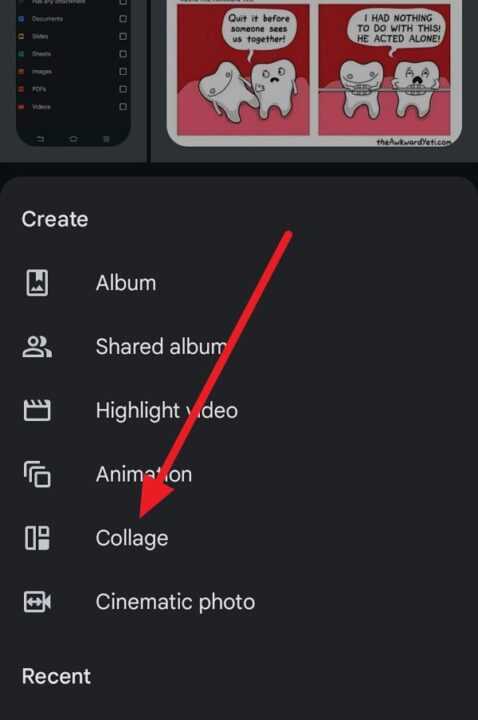
- Tap on the “Add to” button to reveal a pop-up menu of options.
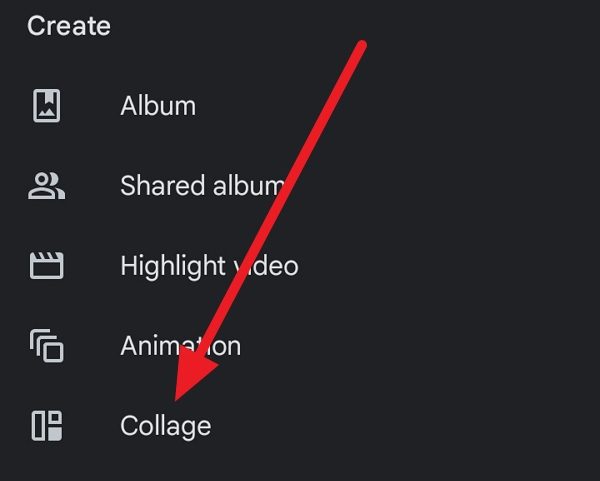
- From the menu that appears, select “Collage”.

By choosing this option, Google Photos will automatically begin creating a collage using the photos you’ve selected.
Step 3: Customize Your Collage Design
Once you’ve initiated the collage creation process, Google Photos will present you with an initial layout. However, you have the flexibility to customize your collage to suit your preferences. Here’s how you can make adjustments:
- At the bottom of the screen, you’ll see a variety of collage designs and templates.
- Swipe through these options to preview different layouts for your selected photos.
- Tap on a design that appeals to you to apply it to your collage.
Customization options:
- You can drag and drop photos within the collage to rearrange their positions.
- To replace a photo, tap on it and select “Replace” from the options that appear. Then choose a new photo from your gallery.
- If you want to edit individual photos within the collage, tap on a photo and select “Edit” to access basic editing tools like filters, cropping, and adjustments.
Remember, the goal is to create a collage that best represents your vision and the story you want to tell through your photos.
Step 4: Fine-tune Your Collage
Google Photos offers additional options to refine your collage further:
- Adjust photo sizes: You can pinch to zoom in or out on individual photos within the collage frames.
- Rotate photos: Touch and hold a photo, then use a rotating gesture to turn it to your desired orientation.
- Change photo order: If you want to swap the positions of two photos, simply touch and hold one photo, then drag it over another to exchange their places.
Take your time experimenting with these options to achieve the perfect layout for your collage.
Step 5: Save Your Collage
Once you’re satisfied with your collage design and any edits you’ve made, it’s time to save your creation:
- Look for the “Save” button, typically located in the bottom right corner of the screen.
- Tap “Save” to finalize your collage.
Google Photos will process your collage and save it as a new image in your gallery. The collage will be treated as a single image, making it easy to share or further edit if needed.
Step 6: Find and Share Your Collage
After saving your collage, you might want to locate it quickly or share it with others. Here’s how:
- To find your collage, tap on the “Search” tab at the bottom of the Google Photos app.
- In the search bar, type “Collages” and tap on the “Collages” option that appears.
- Your newly created collage should appear along with any other collages you’ve made previously.
To share your collage:
- Open the collage in Google Photos.
- Tap the “Share” button, usually located at the bottom left corner of the screen.
- Choose your preferred sharing method from the options presented, such as messaging apps, social media platforms, or email.
Conclusion
Creating a collage in Google Photos on your Android device is a straightforward and enjoyable process. With just a few taps, you can transform your individual photos into a beautiful, shareable composition that tells a story or captures the essence of a moment. The app’s intuitive interface and variety of customization options make it accessible for users of all skill levels.
Remember, the key to a great collage is selecting photos that work well together and experimenting with different layouts until you find the one that best suits your vision. Don’t be afraid to get creative and try out various combinations – the beauty of digital collage-making is that you can always start over if you’re not satisfied with the result.
Whether you’re commemorating a special event, showcasing your travels, or simply creating a fun visual representation of your memories, Google Photos’ collage feature is a powerful tool at your fingertips. So go ahead, dive into your photo library, and start creating stunning collages that bring your photos to life in new and exciting ways.

Leave a Reply